
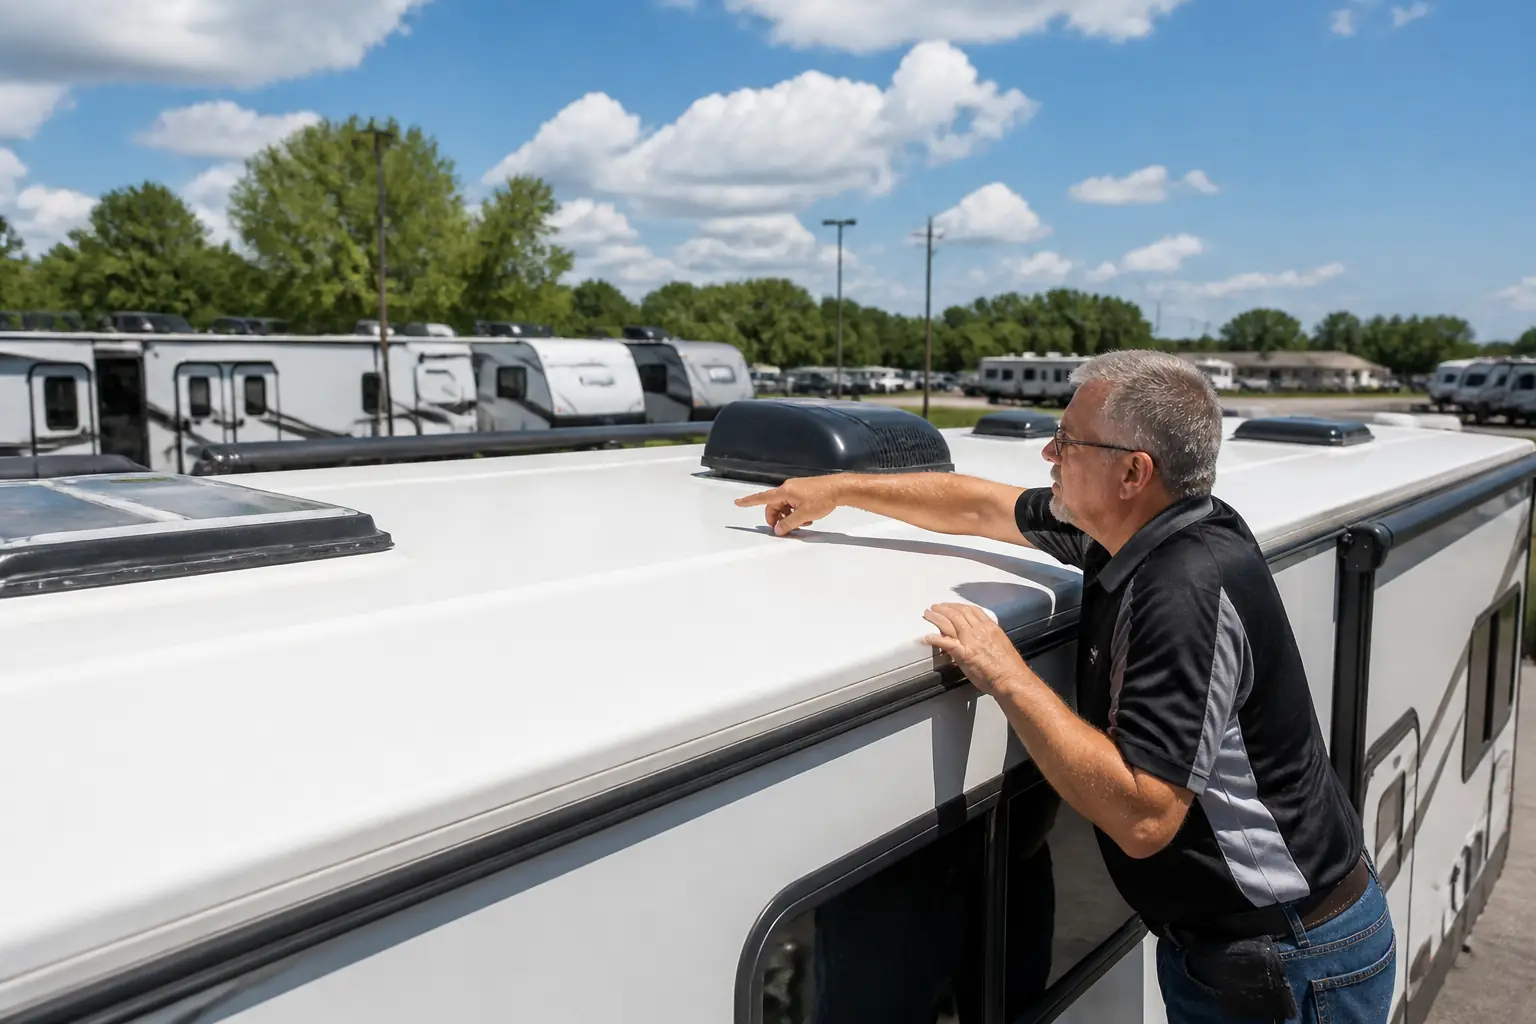
Inspecting a New RV: The Ultimate Pre-Delivery Inspection Guide
When purchasing a brand-new recreational vehicle, conducting a thorough pre-delivery inspection ensures every component works as intended before you leave the dealership lot. Inspecting a new RV allows you to catch minor factory adjustments, test every appliance under load, and verify that sealants, plumbing, and electrical systems are 100% operational.
At Rex & Sons RVs in Castle Hayne, North Carolina, we believe an educated buyer is a happy camper. Welcome to Chapter 6 of our RV Buyer's Guide. Whether you are picking up a travel trailer, motorhome, or fifth wheel, this step-by-step checklist empowers you to walk through your new rig with confidence.
Why New RVs Need Inspection
It is a common myth that brand-new RVs come off the factory transport driver's hitch in 100% road-ready condition. RVs are hand-built houses built to withstand hurricane-force winds and earthquake-like vibrations while driving down the highway. During transport from manufacturing facilities to coastal North Carolina, trim can settle, plumbing fittings can loosen, and sealants can stretch.
A rigorous Pre-Delivery Inspection (PDI) gives you the opportunity to catch these items early. Testing every switch, valve, and slide mechanism while still at the dealership ensures that necessary adjustments are addressed promptly under warranty, preventing unexpected interruptions during your first weekend getaway.

Comprehensive New RV Inspection Checklists
Take your time working through each zone of the RV. Bring a small flashlight, a notebook, an outlet tester, and a camera to document any questions during your walkthrough.
1. Exterior Inspection Checklist
Start outside on level ground. Visually scan from top to bottom before stepping inside.
- Roof Seals & Lap Sealant: Check all roof seams, vents, skylights, and end caps for continuous self-leveling sealant without cracks or gaps.
- Sidewalls & Graphics: Look down the sides for delamination, bubbles, or scratched decals.
- Windows & Doors: Ensure entry doors latch smoothly, deadbolts align, and window seals seat flush against the body.
- Underbelly & Frame: Inspect the coroplast underbelly covering for loose trim or tears, and verify frame paint is free of heavy rust or damage.
- Tires & Lug Nuts: Check tire manufacturing date codes, inflation pressure, and verify lug nuts are torqued to specification.
2. Slide-Out Mechanisms & Seals
Extend and retract every slide-out room multiple times while operating on both battery and shore power.
- Operation: Ensure the room moves smoothly without binding, groaning, or uneven tracking.
- Bulb Seals & Wipers: Verify exterior rubber wiper seals flip outward when extended and inward when retracted.
- Internal Alignment: When closed, ensure the slide fascia sits flush against the interior wall without crushing trim or leaving daylight visible.
3. Interior Fit, Finish & Cabinetry
Work systematically from the front cap to the rear bumper across all living spaces.
- Cabinetry & Hardware: Open and close every cabinet door and drawer to ensure latches catch tightly and hinges do not bind.
- Flooring & Ceiling: Inspect linoleum or vinyl for tears, bubbles, or loose transitions near slide tracks.
- Furniture & Dinettes: Convert dinettes and sofa beds into sleeping configurations to ensure panels fit properly.
4. Plumbing & Water Systems
Plumbing systems should be pressurized with water, not just air tested.
- Fresh Water Tank & Pump: Fill the tank, run the 12V water pump, and check for quiet, steady pressurization without cycling when faucets are closed.
- City Water Connection: Connect to city pressure and inspect all faucet connections, showerheads, and toilet valves for drips.
- Holding Tanks & Valves: Inspect waste gate valves (gray and black) for smooth operation and secure caps.
- Water Heater: Test heating performance on both propane (gas ignition) and 120V electric modes.
5. Electrical Systems (12V DC & 120V AC)
Verify both off-grid battery power and shore-power connection functionality.
- 120V Outlets & GFCI: Plug an outlet tester into every wall socket, testing GFCI reset buttons in the kitchen and bathroom.
- 12V Lighting & USB Ports: Turn on every interior and exterior light fixture, power awning light strip, and device charger.
- Converter/Charger & Battery: Confirm the converter is charging the house battery when plugged into shore power.
6. Appliances & Climate Control
Run appliances simultaneously to ensure breaker panels and fuses perform under load.
- Air Conditioner & Heat Strip: Run the A/C, measure cold air output at vents, and check thermostat zone controls.
- Furnace: Turn on the furnace, verify ignition, and feel for warm airflow at floor-level registers.
- Refrigerator: Test gas and electric modes, verifying the freezer and cooling fins drop in temperature.
- Range & Oven: Light all stove burners and furnace pilot lights to check flame color (blue is ideal).
7. Safety Equipment & Gear
- Detectors: Test propane (LP) leak detectors, carbon monoxide alarms, and smoke detectors.
- Fire Extinguisher & Emergency Exits: Ensure fire extinguishers are fully charged and emergency egress windows open smoothly.
RV Inspection Quick Reference Table
| Inspection Zone | Primary Focus Item | Common Issue to Spot | Verification Method |
|---|---|---|---|
| Roof & Exterior Seals | Dicor Lap Sealant & Bead Integrity | Pinholes, void cracks near vents | Visual check on elevated ladder |
| Slide-Out Systems | Wiper seals & cable/rack alignment | Sticking rubber, uneven travel | Cycle slide fully 2-3 times |
| Plumbing System | PEX fittings & pump pressure | Slow seepage under bathroom sink | Pressurize system with water for 15 min |
| Electrical System | GFCI circuits & 12V converter | Reverse polarity or loose ground | Use 3-prong receptacle circuit tester |

Why Rex & Sons Inspects New RVs Differently
At Rex & Sons RVs, we take a different approach than high-volume corporate mega-stores. Before you ever arrive for your delivery appointment at our Castle Hayne dealership, our certified service technicians conduct our own extensive Multi-Point PDI walkthrough.
We fill the fresh water tanks, pressurize the plumbing lines, fill the propane tanks, hook up shore power, and run every air conditioner and furnace for hours. When you arrive, our expert technicians conduct a dedicated one-on-one orientation walkthrough, teaching you how to operate every single feature on your new Forest River, Palomino, East to West, InTech, or Winnebago RV.
Frequently Asked Questions
How long should a new RV pre-delivery inspection take?
A thorough PDI walkthrough generally takes between 1.5 to 3 hours. Do not rush this process; taking your time ensures you understand how all systems function before heading to your campsite.
What tools should I bring to a new RV walkthrough?
We recommend bringing a small LED flashlight, a 3-prong circuit tester, a digital thermometer (for testing A/C and refrigerator temperatures), a notepad, and a smartphone camera to take videos of operating instructions.
What happens if we find defects during the inspection?
Any items discovered during the inspection are documented on a punch list. Minor adjustments are often handled immediately by our service technicians before you take off. Larger items are scheduled for prompt warranty service.
Ready to Start Your RV Journey?
Inspecting a new RV gives you ultimate peace of mind when embarking on memorable road trips with family and friends. If you have questions about choosing or inspecting your next travel trailer, motorhome, or toy hauler, our friendly family team is here to help. Call our sales specialists today at (910) 793-2894 or browse our extensive inventory online to find your dream RV.
Visit us at Rex & Sons RVs in Castle Hayne, NC, or explore our new RV inventory and contact our team to schedule your personalized walkthrough today!